Introduction
JetBrains editors are great for all kinds of projects, whatever big they’re. However, once you’ve started working on big projects, you’re beginning to notice that it’s getting harder finding your way through open files, the project tree, or the search results.
Therefore, the IDEs have a nifty feature called File Colors. It allows developers to add custom colors to specific groups of files according to a pattern.
Such examples are:
- Excluded Files
- Tests
- Erroneous files
- Build Files
- Logs
- etc…
You can even set specific folders representing different parts/modules of your project.
As a result, files belonging to such categories would sport a distinct background color, significantly reducing the time looking for a file and navigating thanks to color grepping.
Such components having this feature are:
- Project Tree
- Editor Tabs
- Find in Path Dialog
- Search Everywhere dialog
- Navigate to file/class/symbol dialog
- And other places…
Configuration
The JetBrains editors come prebundled with at least two File Colors:
- Excluded files, or files that are Marked as Excluded, and therefore excluded for indexing, searching and navigation, resulting in huge performance
boosts.
- Such examples are
node_modules,logs,vendors,gradleetc…
- Such examples are
- Tests, which is the test directory in
gradle/rails/symfony…
Note: you can mark a directory for exclusion by clicking right on the directory and select Mark Directory as…
Specific IDEs might have other File Colors preinstalled.
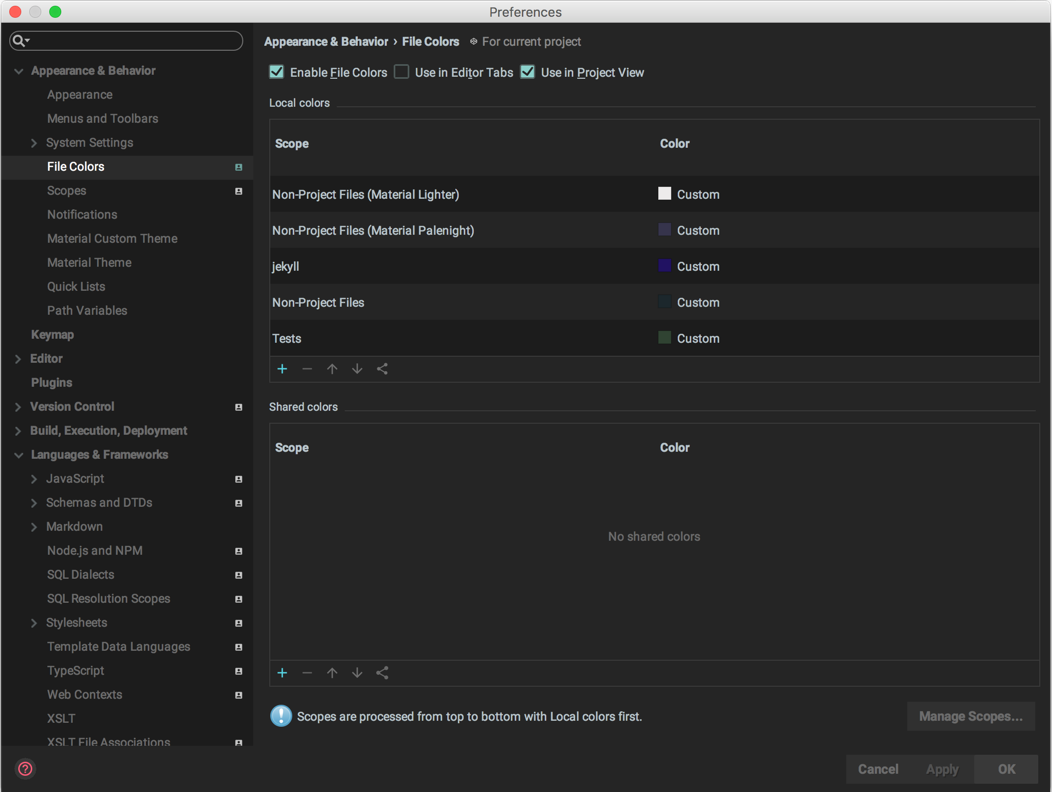
You can find them within Settings → Appearance & Behavior → File Colors.

By using this settings screen, you can add new colors, share them across projects, disable them in specific components, or assign them different priority if needed.
Tip: there’s also a nice plugin, Project Tree Highlighter, giving you the ability to colorize folders from the Project View directly.
Scopes
The two pre-bundled options are pretty limited, but you can add your own file colors according to certain patterns.
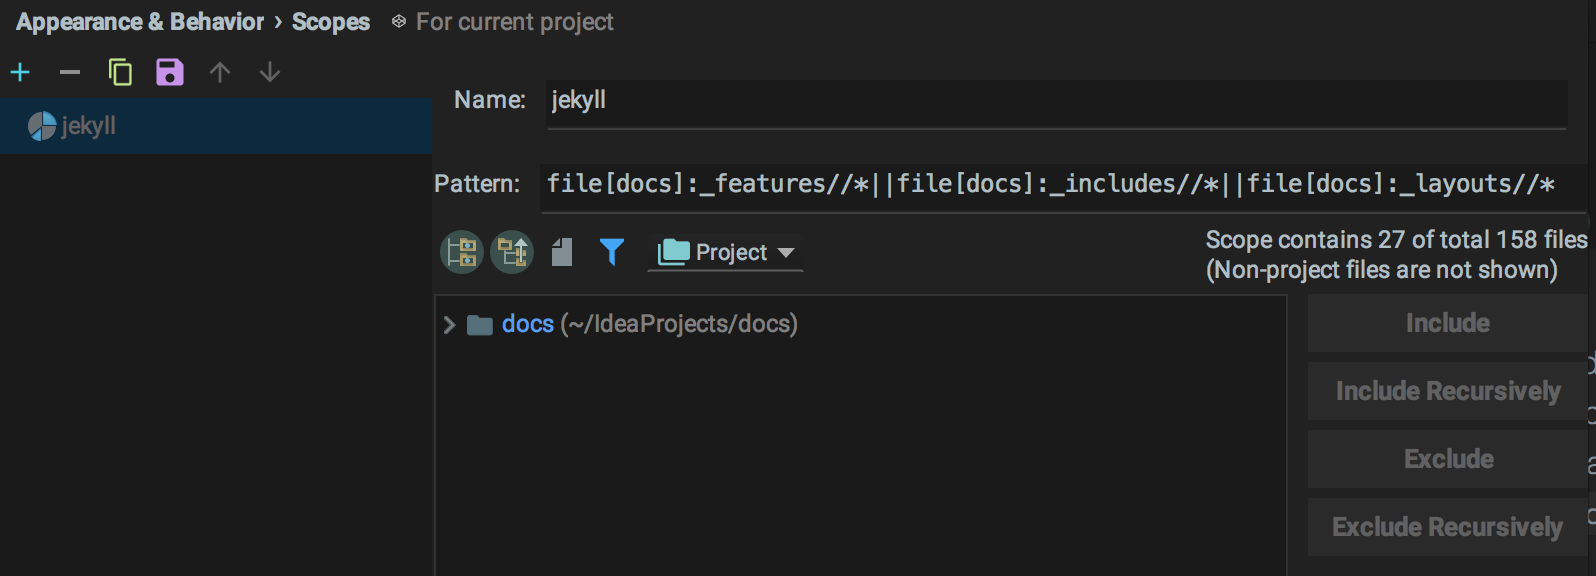
For example, differentiating between the docs directory than the rest of the source.
To do so, you have to create a Scope. There you can define your pattern rules, which directories should be included in the scope and which should be excluded. Finally, add your new created scope in the File Colors list, and rise it up to the top, so it won’t be shrouded by other file colors.

See more at File Colors
Material File Colors
Excluded files theme color
File Colors are pretty neat, but the current prebundled File Colors are adapted for the Darcula/IntelliJ look and feels, not for the Material Themes.
To remedy this, the plugin is also coming prebundled with File Colors, specifically for Excluded files.
However, because the File Colors are user settings, and because the user could have modified the default Excluded Files’ color, the plugin couldn’t override this setting with its own. Therefore, it’s the responsibility of the user to change the color of the Excluded Files.
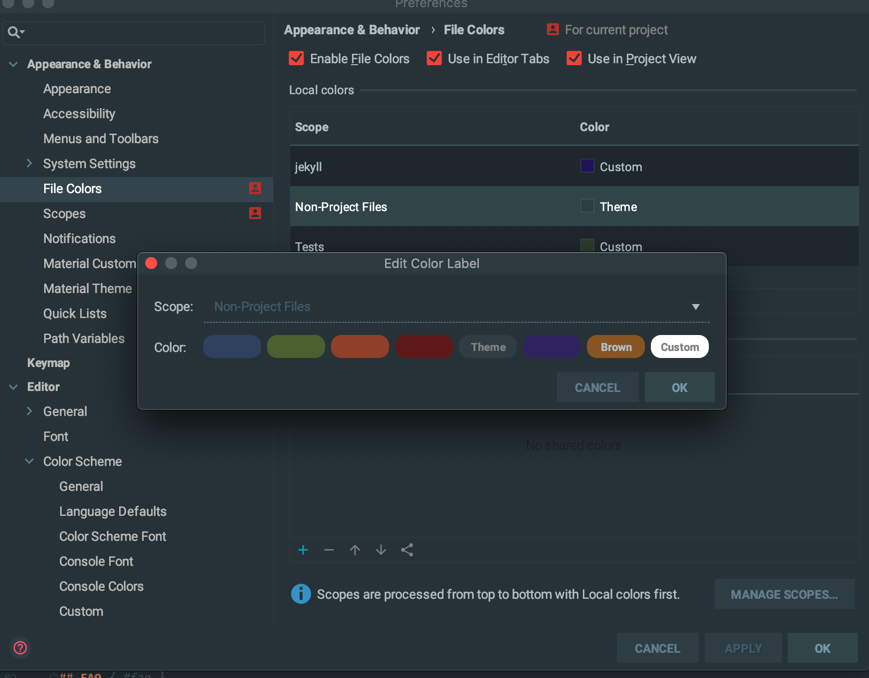
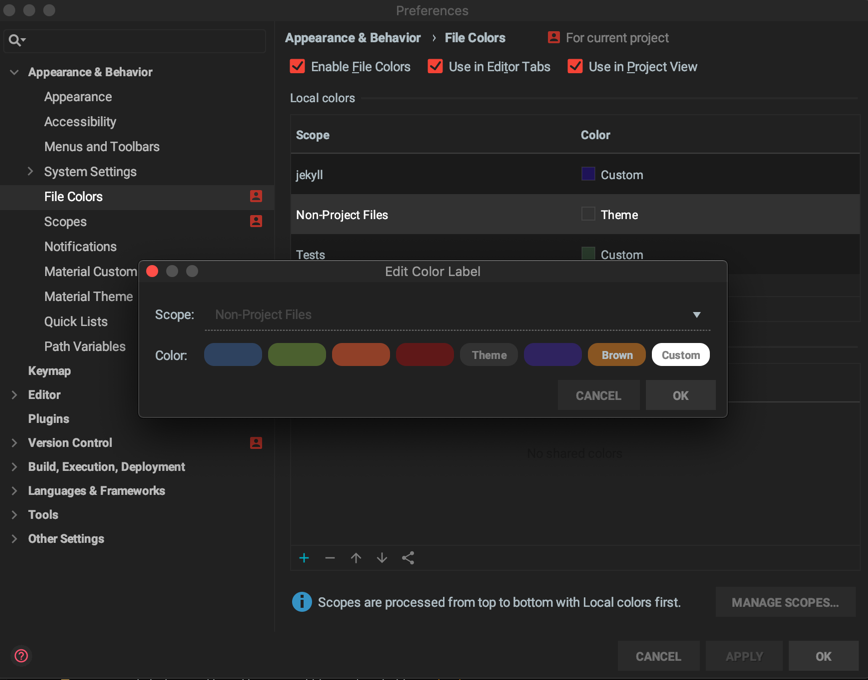
To do so, open the File Colors Settings (Appearance > File Colors), select the scope you want to change the color, for instance, “Excluded Files”,
and click to the Edit button.
There you should see a list of predefined colors, as well as one specific color named Theme Excluded Color,
corresponding to the current theme’s Excluded Color.

Moreover, if you select this color and switch to another theme, the selected theme’s excluded color should be applied automatically.
Note: the Project View won’t get the color change right away, due to its caching feature. But this shall be solved eventually. {class=’card-panel warn’}
Other colors
Aside from the Theme Excluded Color, the plugin also comes with other colors, better suited for the provided themes.
